A strip of old film can hold some of the best family photos you own - but if it stays tucked in a drawer, it is also one of the easiest things to lose, scratch or forget about. If you want to scan negatives to digital photos, the main aim is simple: keep the detail, avoid damage and end up with files you can actually use for prints, albums and sharing.
That sounds straightforward, but the right approach depends on what kind of negatives you have, how many there are and what you want from the finished files. A quick phone snap of a negative might be enough for a casual look. If you want proper digital copies for printing, enlarging or long-term storage, quality matters more than speed.
Why scan negatives to digital photos at all?
Negatives often contain more image detail than old paper prints, especially if those prints have faded over time. Scanning from the original film can give you a cleaner, sharper result with better tone and contrast. That is particularly useful if you are rebuilding a family archive or reprinting photos that only exist as ageing prints.
There is also the practical side. Once your negatives are digitised, it becomes much easier to order prints, create photo gifts, store copies safely and share images with relatives. Instead of passing around a fragile sleeve of film, you can keep organised folders and back-ups.
What type of negatives do you have?
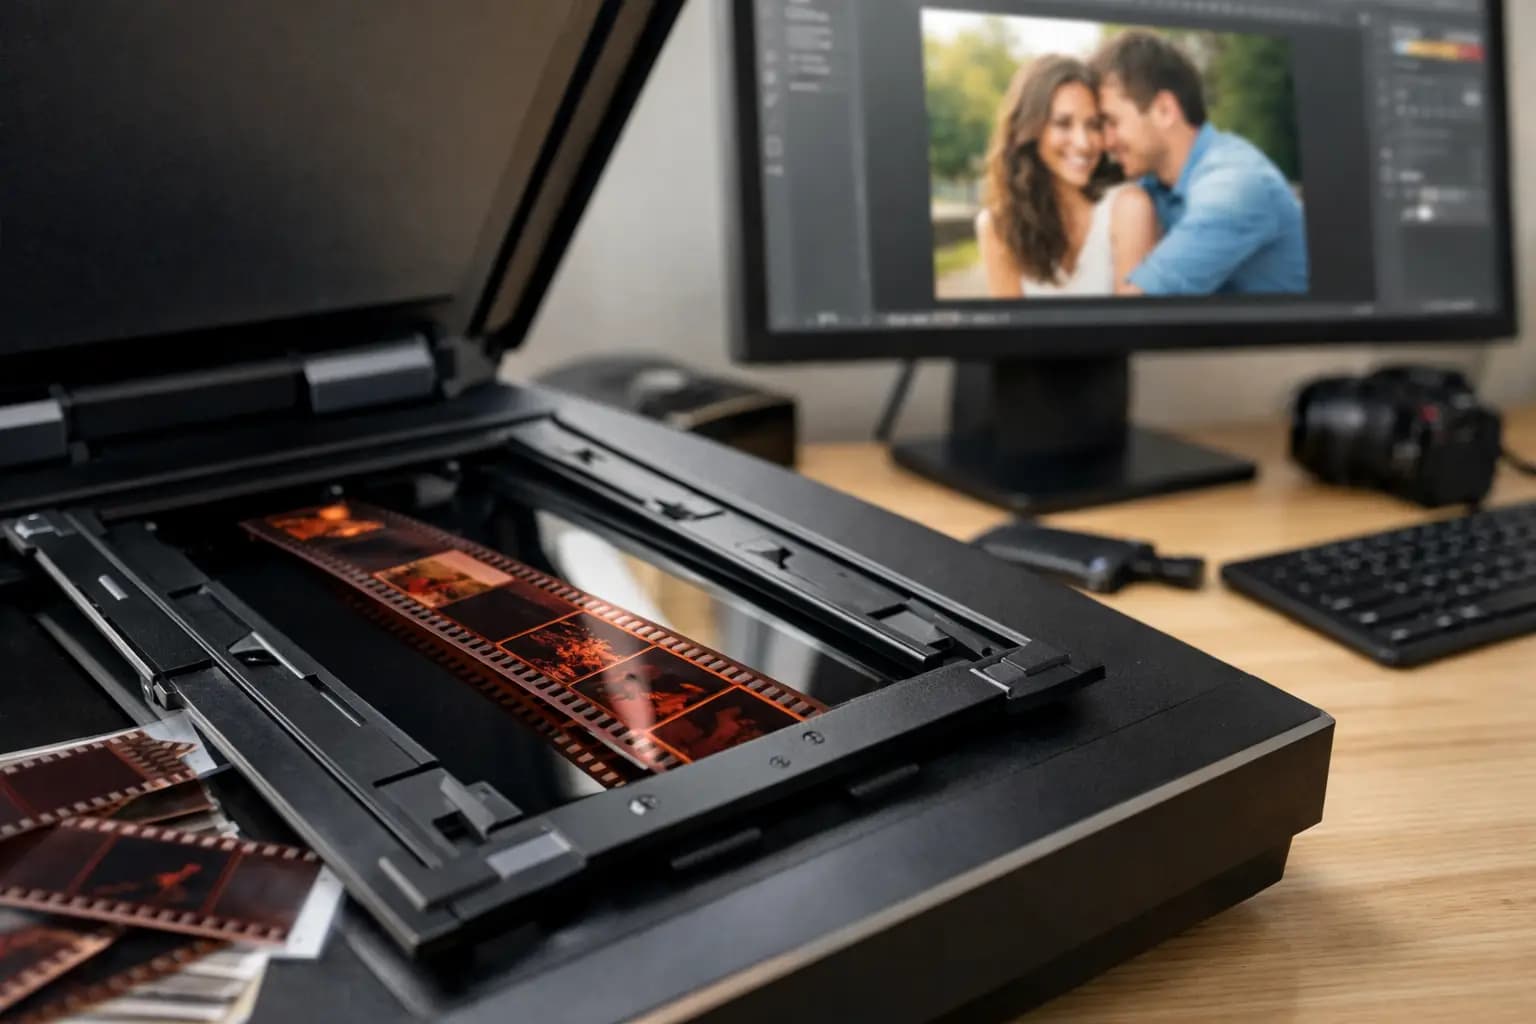
Before choosing a method, it helps to know what you are working with. Most household collections are 35mm film negatives, usually stored in strips. Some customers also have 120 film, which is larger and often used in medium format cameras. You may even have a mix of colour negatives, black and white negatives and slides.
This matters because not every scanner handles every format well. Flatbed scanners can be suitable for some jobs, but they are not always the best choice for smaller film formats if you want strong detail. Dedicated film scanners usually give better results for negatives, but they can be slower and more expensive. For 120 film, the options narrow further.
The main ways to scan negatives to digital photos
There are three realistic routes for most people: scan them yourself with a flatbed scanner, use a dedicated film scanner, or send them to a specialist photo lab.
A flatbed scanner is often the most accessible option if you already own one with a film holder. It can work well for basic archiving and smaller print sizes. The trade-off is quality. Some flatbeds produce soft files from 35mm negatives, and colour correction can take time.
A dedicated film scanner is built for the job. It usually offers better sharpness, more accurate detail and improved handling of exposure range. If you have a large archive and do not mind a slower workflow, it can be a good investment. The downside is cost, plus the learning curve if you are not used to scanning software.
A specialist service is often the simplest route if you want consistent quality without the trial and error. That is especially true for older negatives, mixed film sizes or family collections where you want the files ready for printing rather than spending evenings adjusting each frame yourself.
What makes a good negative scan?
Resolution matters, but it is not the only thing. A useful scan should capture enough detail for the way you plan to use the image. If you only want to view photos on a phone or laptop, you do not need the same file size as someone ordering large enlargements. On the other hand, scanning too small now often means scanning everything again later.
Colour accuracy is another big factor. Old negatives can pick up a colour cast, and cheap scanning can leave images looking flat, overly orange or washed out. Dust removal also makes a visible difference. Film attracts marks easily, and they become very obvious once enlarged on screen.
File format matters too. JPEG is convenient and fine for everyday use, while TIFF files are larger but better if you want to keep more editing headroom. It depends on whether your aim is simple sharing or preserving the best possible version for the future.
Scanning negatives at home - when it works well
Home scanning can be a sensible option if you have the time, patience and suitable equipment. For smaller collections, it gives you control over cropping, exposure and file naming. It can also be useful if you are sorting through negatives gradually and do not need everything done at once.
The process is usually straightforward. Clean the negatives carefully, place them in the holder, scan at an appropriate resolution, invert the image if needed and save the files in organised folders. The real time sink is not pressing the scan button. It is checking each frame, adjusting colour, removing dust and making sure you have named everything in a way that still makes sense six months later.
That is where many people hit a wall. A box of negatives rarely contains ten tidy images. It is more often hundreds of frames from different decades, cameras and storage conditions. If you are only part-way through the first sleeve and already tired of correcting orange tones, a lab service starts to look much more appealing.
Common problems when you scan negatives to digital photos
The most common issue is disappointing quality from the wrong equipment. People often expect any scanner to handle film well, but negatives need proper light handling and enough optical resolution. A weak scan may look acceptable on a small screen and then fall apart when printed.
Dust and scratches are another problem. Even carefully stored negatives pick up marks over time. If they are not cleaned gently before scanning, every speck can become extra editing work later.
There is also the question of exposure. Negatives can include dense frames, underexposed shots or scenes with strong contrast. Automated settings do not always get these right. One image might scan beautifully while the next looks muddy or blown out. That is normal, and it is one reason bulk home scanning can become inconsistent.
When a specialist scanning service is the better option
If your negatives are important, irreplaceable or intended for printing, a specialist service is usually the safer choice. The same applies if you have 120 film, fragile strips, family archive projects or large quantities that would take too long to handle yourself.
A good lab will work with equipment designed for film, not just general office scanning. That tends to mean cleaner detail, better colour balance and files that are more useful for reprints, albums and personalised photo products. It also removes the guesswork around settings and format compatibility.
For many households, convenience matters just as much as technical quality. Being able to hand over a packet of negatives and receive ready-to-use digital files is often worth it, particularly when the alternative is buying equipment you may only use once. This is where a service such as Photo Zone makes practical sense for customers who want a straightforward UK option with specialist support.
How to prepare your negatives before scanning
You do not need to overcomplicate this, but a little preparation helps. Keep negatives in the order you want them scanned, and separate different film types if you can. If you know dates, locations or family names, make a note before sending them anywhere. That information is much harder to reconstruct afterwards.
Handle film by the edges and avoid household cleaning sprays or rough cloths. If negatives are badly curled, stuck together or showing signs of mould, do not try to force them flat. That is exactly the sort of situation where expert handling is the safer option.
Choosing the right file size for future use
Think beyond today. If you only want quick digital copies for messaging, small files may be enough. If there is any chance you will want fresh prints, framed enlargements or photo gifts later, it is usually better to choose a higher-quality scan from the start.
Rescanning is possible, but it means handling the negatives all over again. For older family film, one careful, well-made scan is often the most efficient route. It gives you a master copy to keep, back up and reuse whenever you need it.
After scanning - make the files useful
Once your negatives have been turned into digital photos, store them properly. Keep copies in more than one place, organise folders by year or event and use clear file names. This takes a bit of effort at the start, but it saves a lot of frustration later when someone asks for that one holiday picture from Cornwall or a grandparent's wedding photo.
Digital files become far more valuable when they are easy to find and ready to print. That is really the point of the whole job. Negatives sitting in an envelope are preservation waiting to happen. Scanned properly, they become photos you can use again.
If you have a box of old film and have been putting it off, start with the images that matter most. Once those memories are safely digitised, the rest becomes much easier to tackle.